Clip Bin
|
Scan QR codes with a mobile device to view online video tutorials. An Internet connection is required to view online content. |
Explore the Editor
|
Timeline In-Depth
|
 Online Videos Available


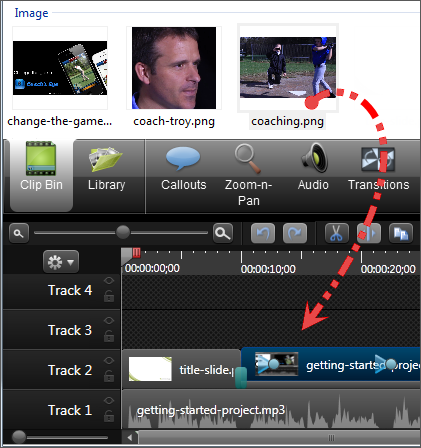
The Clip Bin references all video, audio, and image clips imported into the current project. You can add multiple instances of a clip onto the timeline.
To add a clip to the video, drag the clip from the Clip Bin onto the timeline or right-click on a clip and select Add to Timeline at Playhead.
- A produced video only includes the clips and elements on the timeline.
-
Clips in the Clip Bin are not affected by any editing on the timeline. When you add a clip to the timeline, you create a copy of the source clip. For example, if you split a clip on the timeline, the split is not reflected in the original clip in the Clip Bin.
- To import media, see Import Media into Clip Bin.
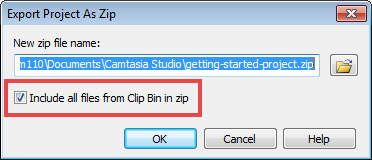
Moving or deleting original files (for example, on a hard drive or network) that have been imported into the Clip Bin can break your Camtasia Studio projects. Before moving or deleting any files, open your video projects and export them as a Camtasia Studio zipped project file.
Be sure to select the Include all files from the Clip Bin in zip option. This creates a self-contained project with backed up Clip Bin files.
Change the Clip Bin View
By default, the Clip Bin displays the clips as Thumbnails sorted by Groups. You can change the Clip Bin view or sort the clips by different criteria to help organize the Clip Bin.
To change the view, right-click in the Clip Bin and choose the view from the menu.
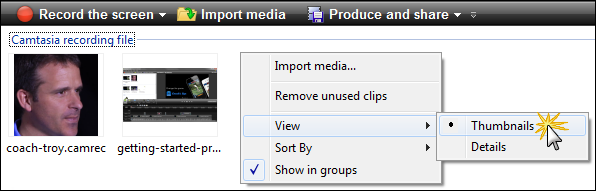
- Thumbnail View
Display an image of the clips. - Details View
Provide detailed information about the clips, such as file size, dimensions, and duration.
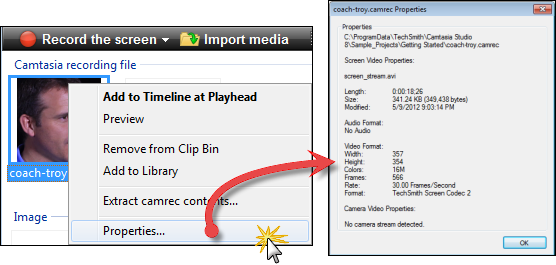
View Media Properties
To view additional clip properties such as file name, location or size, right-click on a clip and select Properties from the context-menu.
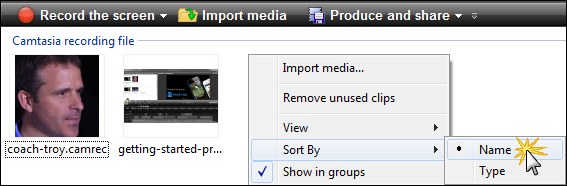
Sort Media in the Clip Bin
By default, the Clip Bin organizes the clips into groups by media type. You can sort the clips in the Clip Bin by name or type.
To change the sort criteria, right-click in the Clip Bin and choose Sort by from the context menu.
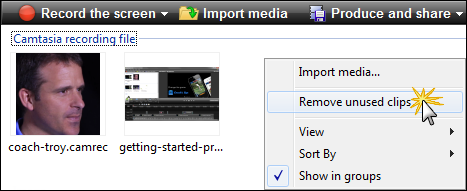
Remove Unused Media in Clip Bin
To remove any clips or media not being used on the timeline, right-click in the Clip Bin and select Remove unused clips from the context menu.