
Add Media to the Library
|
Scan QR codes with a mobile device to view video tutorials or PDF guides. An Internet connection is required to view online content. |
Timeline In-Depth Video
|
Create Library Media to use in Camtasia Studio PDF
|
Create Engaging Screencasts PDF
|
 Online Resources Available


You can add the following file formats to the Library:
- Video files (TREC, CAMREC (Camtasia Studio version 8.3 and earlier), AVI, MP4, MPG, MPEG, WMV, MOV, SWF)
Camtasia Studio does not support multiple tracks in an MOV. Camtasia Studio imports one video and one audio track from an MOV file.
Only SWF files created with Jing or a previous version of Camtasia Studio can be imported.
- Image files (BMP, GIF, JPG, PNG)
- Audio files (WAV, MP3, WMA)
- Zipped Library file (LIBZIP)
You can also add the following timeline media to the Library:
- Callouts
- Timeline selections with or without transitions and animations
- A group with or without transitions and animations
- Quizzes that are pinned to media in a group
- Quizzes pinned to media that are in a timeline selection
- Captions in a group
- Captions in a timeline selection
Add Library Media to the Timeline
To add an asset to the video, drag it from the Library onto the timeline or right-click on an asset and select Add to Timeline.
To Add Media to the Library
- In Editor, make a media or playhead selection on the timeline or select a clip in the Clip Bin.
- Right-click the selection and choose one of the following: Add playhead selection to Library, Add asset to Library, or Add to Library.
The asset appears in the Library.
How do you want to add assets to the Library?
When assets are added to the Library, they are added as a copy of the asset file or as a link to the asset file.
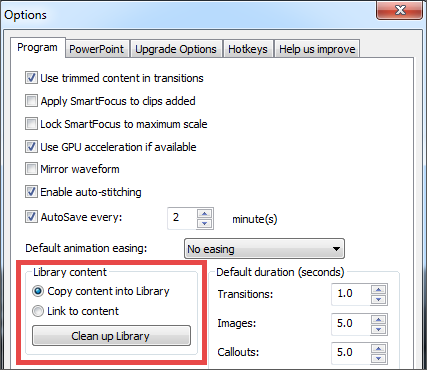
To select a default method for adding assets, choose Tools > Options > Program tab > Library content group box.
Each option is explained below.
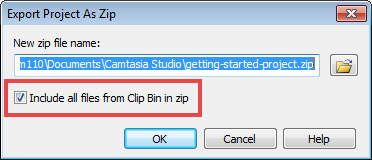
Deleting Library assets can break other projects using those assets. Also, moving or deleting files that have been imported into the Library can break your Camtasia Studio projects. Before moving or deleting any files, open your video projects and export them as a Camtasia Studio zipped project file.
Be sure to select the Include all files from the Clip Bin in zip option. This creates a self-contained project with backed up Clip Bin files.
Copy Content into Library
This option places a copy of all assets into the Library. Since copied assets increase the file size of Camtasia Studio projects, it is best to only copy assets used from project to project into the Library. Use the Clip Bin to hold the media files only needed for the current project.
When adding a timeline selection or group (also called timeline sequence) to the Library as a copied asset, if there is a video portion in the sequence, the entire video is added as a copy – not just the selected portion. Since this can increase the file size of your of Camtasia Studio projects, it is recommended that timeline selections be added to the Library as links, not copies.
Link to Content
This option links to the original asset file on a hard drive or network location. Since moving the asset from its original location breaks projects that link to those files, it is recommended that assets be placed in a location where they will not be moved or accidentally deleted.
To change a linked asset into a copied asset, right-click the asset in the Library and select Properties from the context menu then click Copy to Library.

Clean Up Library
The Clean Up Library option removes any broken links, rebuilds the Library indexes, and updates your folders.
If you frequently add, delete, and move assets within the Library, it is good to perform this routine maintenance on a regular basis. See Clean Up Library for more information.