
Markers
|
Scan QR codes with a mobile device to view online video tutorials. An Internet connection is required to view online content. |
Introduction to Markers
|
Editing In-Depth
|
 Online Videos Available


Use markers to
- Create navigation points. If you include a table of contents in the final video, the markers appear as table of contents entries.
- Mark an area in the recording that needs to be cut out during editing.
- Set points to split a long video into multiple videos.
Add markers while
- Recording a .trec video in Recorder. Recorded markers can be edited in Editor.
- Editing in Editor.
- Recording a PowerPoint presentation. Each slide is brought into the Editor as a separate marker.
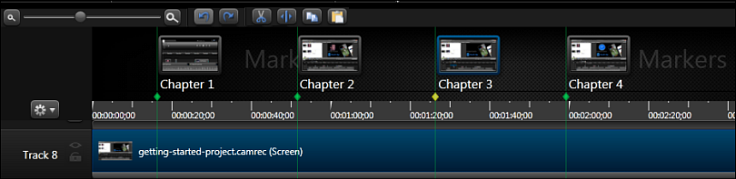
When a marker is added to the timeline, the marker view automatically opens at the top of the timeline.
Continue with
- Markers on the Timeline
- Add a Marker While Marker View is Closed
- Add a Marker While Marker View is Open
- Pin a Timeline Marker to a Media Clip
- Turn a Media Marker into a Timeline Marker
- Marker Options
Markers on the Timeline
- Markers can be added to the timeline or pinned to media on the timeline.
- By default, markers are added as timeline markers.
- When added to the timeline, markers stay in the same location regardless of what media is added, moved, or deleted on the timeline. Timeline markers cannot be added to the Library.
- When pinned to a media or group, if the media/group is moved, deleted, copied, pasted, or added to the Library, the marker goes with it.
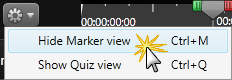
- Use the Marker/Quiz button on the timeline to show or hide the marker view.

- When the marker view is open, you are in Marker mode which allows you to quickly and efficiently add new markers and edit existing ones.
- You must be in marker view to edit, view, or delete markers.
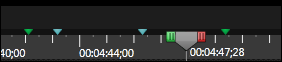
- When not in marker view, marker placement is seen above the timeline as green and blue indicators.
- Green indicates timeline markers.
- Blue indicates makers pinned to media.
Add a Marker While Marker View is Closed
- Position the playhead on the timeline.
- Press M on the keyboard.
- The marker view opens and the marker is added to the timeline.
- Enter a name and press Enter on the keyboard. If you include a table of contents in the final video, the marker names appear as table of contents entries.
Add a Marker While Marker View is Open
When the marker view is open, you are in Marker mode which allows you to quickly and efficiently add new markers and edit existing ones.
- Hover the cursor over the timeline moving it along the top of the tick marks and media clips. Notice how marker indicators appear wherever a marker can be added.
- To create a:
- Timeline marker, hover over the time tick marks at the top of the timeline. A green indicator appears.
Or - Media marker, hover over the top of a media clip. A blue indicator appears.
- Timeline marker, hover over the time tick marks at the top of the timeline. A green indicator appears.
- Click indicator to create the marker.
- When finished adding markers, hide the marker view.
Pin a Timeline Marker to a Media Clip
- Show the marker view.
- Drag the timeline marker along the timeline to where it will be pinned on the media clip.
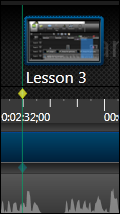
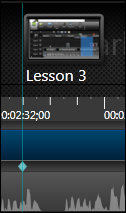
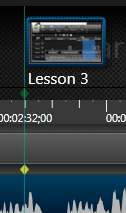
- Click the marker thumbnail to highlight it. When selected, it is framed in blue and the marker indicator is yellow.

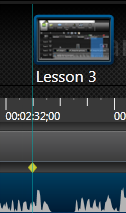
- Hover the mouse cursor over the top of the media clip. A blue indicator appears.
- Click on the blue indicator. The indicator changes position and color. It is now pinned to the media.
- When finished adding markers, hide the marker view.
Turn a Media Marker into a Timeline Marker
- Open the marker view.
- Click the media marker thumbnail to highlight it. When selected, it is framed in blue and the marker indicator is yellow.
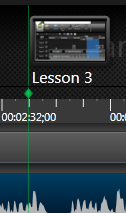
- Hover the mouse cursor over the time tick marks at the top of the timeline. A green indicator appears.
- Click on the green indicator. The indicator will change position and color. It is now a timeline marker.
- When finished adding markers, hide the marker view.
Marker Options
| Option | How To |
|---|---|
| Move a marker |
Open the Marker View and drag the marker to a new location on the top of the timeline time or on the media clip. |
| Delete a marker | Open the Marker View then right-click on a marker and choose Delete. |
| Delete all markers | Open the Marker View then right-click on a marker and choose Delete all markers. Markers are immediately removed. |
| Change marker name | Open the Marker View and double-click on a marker name. Enter the new name and press Enter on the keyboard. |
| Split at all markers |
Automatically split clips on the timeline based on the marker locations. Choose Edit > Markers > Split at all markers. |
| Remove all markers |
Remove all markers on the timeline without opening the marker view. Choose Edit > Markers > Remove all markers. A confirmation dialog box appears. Choose Yes to remove all markers. |