
Produce an Animated File (GIF)
To Produce an Animated GIF File
- Make all edits to your video.
- Click Produce and Share.
- The Production Wizard appears. Select Custom production settings from the dropdown. Click Next.
- Select the GIF-animation file option. Click Next.
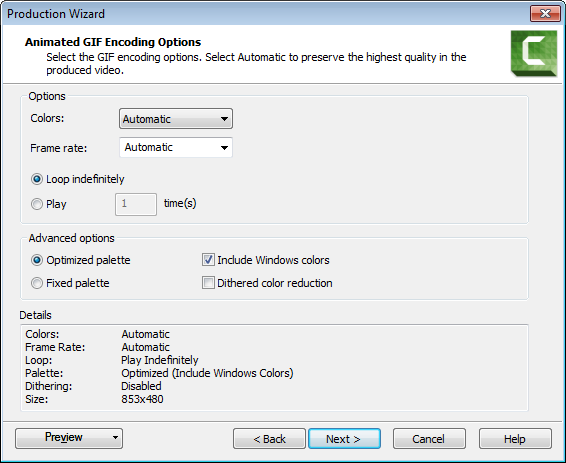
- Select the Animated GIF Encoding Options (see descriptions below). Click Next.
- Select the dimensions and options to reduce file size on the Video Size screen. Click Next.
- Select the Video Options. Click Next.
- If you have markers on the timeline, customize the table of contents or choose to create multiple videos based on the markers. Click Next.
- On the Produce Video screen, enter a video name and choose the post production and upload options.
- Click Finish. The video begins rendering.
- Once production is completed, the Production Results screen appears. Click Finish to exit the Production Wizard.
Click the Preview button at any time in the Production Wizard to produce a 30 second sample of your video using the current settings.
Animated GIF Encoding Options
| Option | Description |
|---|---|
| Colors |
Select Automatic to preserve the highest color setting for clips on the Timeline. To decrease the file size, select a lower color depth. |
| Frame rate |
Select Automatic to preserve the highest frame rate for clips on the Timeline. To decrease the file size, select a lower frame rate. |
| Loop indefinitely | Continuously play the video. |
| Play | Enable to enter the number of times to loop the video. |
| Optimized palette | Uses all colors in all frames in the GIF file. Produces a better quality GIF file than a fixed palette. |
| Include windows colors | Include the standard Windows 20 colors in the GIF file palette. |
| Dithered color reduction | Dithering attempts to smooth the effects of color reduction. Select this option for real-world video content rather than for screen recordings. |
| Details | Displays the audio and video options selected. |